Struggling to get your online business running smoothly? You’ve built something amazing. Now you just need a way for people to pay you.
The thought of coding makes your head spin. You want a simple, quick way to accept payments. There are many options out there.
It can feel overwhelming to find the right one. This guide is here to help you. We’ll explore easy ways to add payment processing to your site or platform.
You can do this without needing to be a tech whiz. Let’s make paying your customers simple.
For businesses needing to accept payments online without custom coding, many platforms offer no-code integration solutions. These tools allow users to add payment buttons, checkout pages, or subscription forms quickly. They often involve simple copy-pasting of code snippets or using visual interfaces. This makes it easy for small businesses, freelancers, and creators to get started accepting money online fast.
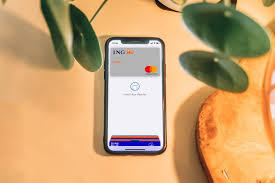
Understanding Stripe No-Code Integration
What exactly is Stripe no-code integration? It means you can use Stripe’s powerful payment system. You don’t need to know how to write computer code.
Stripe is a company that helps businesses take payments online. Normally, adding this to a website takes a lot of technical skill. Developers write code to connect your site to Stripe.
No-code integration means this is already done for you. Someone else has built the bridge. You just need to connect your Stripe account to it.
This is a huge relief for many business owners. You are an expert in what you do. You might sell handmade crafts, offer consulting services, or run an online course.
Your focus should be there. Learning to code can take years. It’s also a different skill set.
No-code tools let you bypass that learning curve. You can get your business set up to take payments in minutes or hours, not weeks or months.
Stripe itself offers several ways to do this. They have tools called Stripe Checkout. They also have Payment Links.
For some platforms, Stripe has direct integrations. These are often called plugins or add-ons. You find them within the platform you’re already using.
Think of it like adding an app to your phone. You don’t build the app; you just install it. No-code Stripe integration works in a similar fashion.
The core idea is simple: make accepting payments easy and fast. It democratizes access to advanced payment technology. Small businesses can compete with larger ones.
They can offer a professional and secure payment experience. This builds trust with customers. Customers want to know their payment is safe.
Stripe is known for its security. Using their no-code tools means you inherit that trust.
Why Go No-Code with Payments?
There are so many reasons why going no-code for payments makes sense. Let’s break down why it’s a smart move for many. It’s not just about avoiding code.
It’s about speed, cost, and focus.
First, speed is a massive factor. Imagine you have a product ready to sell. You can’t sell it until you can take money.
With no-code tools, you can set up a payment option today. You don’t have to wait for a developer. This means you can start earning revenue much sooner.
Every day you wait is a day of lost potential sales. Speed to market is critical for new businesses.
Second, cost savings are significant. Hiring a developer to build custom payment integration can be expensive. You might pay hourly rates.
These can add up quickly. Even finding a good, affordable developer can be tough. No-code solutions are often much cheaper.
Many are included with other services you might already use. Or, they have a simple monthly fee. This is a predictable cost that fits better into a small business budget.
You save money and get the job done.
Third, it lets you focus on your business. Your expertise lies in your products or services. You understand your customers.
You know how to market and grow your brand. Spending time wrestling with code or payment gateways distracts from these core tasks. No-code tools free up your mental energy.
You can concentrate on what you do best. This leads to better business decisions and growth.
Fourth, simplicity and ease of use are key benefits. These tools are designed for non-technical users. They often have visual interfaces.
You click and drag elements. You fill out simple forms. The setup guides you step-by-step.
There are fewer chances for errors. This is unlike coding, where a single misplaced character can break everything. The learning curve is very gentle.
Finally, security and reliability are built-in. When you use Stripe’s official no-code products or integrations, you are using their secure infrastructure. You don’t have to worry about handling sensitive customer data yourself.
This is a huge responsibility. It involves compliance with regulations like PCI DSS. Stripe handles all of that.
You get the security of a major payment processor without the complexity.
Personal Experience: The Frustration of Early Online Sales
I remember when I first decided to sell some digital art online. I was so excited. I had my pieces ready.
I even had a simple website built on a platform that seemed easy. But then came the payments. I looked into how to add a “buy now” button.
It involved looking at Stripe’s developer docs. My eyes glazed over. There were API keys and webhook secrets.
It felt like a foreign language. I spent hours trying to understand it. I was getting nowhere.
It was incredibly frustrating. I felt stuck and defeated. My excitement for selling my art started to fade.
I almost gave up. That’s when I stumbled upon Stripe’s Payment Links. It was a revelation!
I could create a link, add my art details, set a price, and that was it. I pasted the link on my website. Within minutes, I made my first sale.
The relief was immense. That experience taught me the true value of no-code solutions.
Types of Stripe No-Code Integrations
Stripe offers a variety of no-code ways to get paid. They cater to different needs and levels of technical comfort. Let’s look at the main types you’ll likely encounter.
This will help you choose the best fit for your situation.
Stripe Checkout
Stripe Checkout is a pre-built, hosted payment page. It’s designed to be simple to implement. You can add it to your website with just a few lines of code.
But, for no-code users, there are even easier ways. Many platforms integrate directly with Stripe Checkout. Or, you can generate links that point to a Checkout page.
Customers are taken to a secure page hosted by Stripe. This page handles all the payment details. It’s mobile-friendly.
It supports many currencies and payment methods. You don’t need to build any part of the checkout form yourself. It’s already secure and optimized.
When you use Stripe Checkout, you configure what the customer sees. You set the item description, price, and quantity. You can even add taxes and shipping costs.
When a customer clicks your payment button or link, they are redirected. They see a clean page with your product details. They enter their card information there.
Stripe processes the payment securely. Then, the customer is redirected back to your site. This seamless experience builds trust.
It’s a very popular option for its balance of ease and customization.
Payment Links
Payment Links are arguably the simplest way to start. You don’t need a website at all to use them. You go to your Stripe dashboard.
You create a link for a specific product or service. You set the name, price, and currency. You can add an image.
You can also set options for quantity. Once created, you get a unique URL. You can share this link anywhere: on social media, in an email, in a text message, or even on a printed flyer.
When someone clicks the link, they go directly to a Stripe-hosted page to pay. It’s that straightforward. It’s perfect for one-off sales, donations, or simple services.
I’ve used Payment Links for selling individual art prints. I also used them to collect deposits for client projects. It takes literally two minutes to set up.
You don’t need to know HTML, CSS, or JavaScript. It’s a powerful tool for immediate revenue generation. You can also configure options like collecting customer email addresses.
This helps you build your mailing list. It’s an elegant solution when you need to get paid quickly without any technical hassle.
Platform Integrations (Plugins & Add-ons)
Many popular online platforms have built-in integrations with Stripe. These are often called plugins, extensions, or add-ons. Examples include e-commerce platforms like Shopify, WooCommerce (for WordPress), Wix, Squarespace, and even some membership site builders.
For these platforms, Stripe integration is usually a setting you can enable. You connect your Stripe account through the platform’s dashboard. The platform then handles the checkout process.
It uses Stripe in the background. This is a very common and user-friendly approach.
For example, if you have a WordPress site using WooCommerce, you’d go to the WooCommerce settings. You’d find the payments section. Then, you’d select Stripe.
You’d enter your Stripe API keys. These are found in your Stripe dashboard. After that, WooCommerce uses Stripe to process all your customer payments.
It feels like it’s all part of your store. The customer never even sees Stripe directly in many cases. This type of integration offers a very polished customer experience.
It’s deeply embedded within your chosen platform.
This approach is fantastic because the platform developers have already done the heavy lifting. They’ve made sure the integration works well with their system. You benefit from their work.
It often allows for more customization within the platform’s design. You can control the look and feel of your store’s checkout. But the underlying payment processing is handled by Stripe securely.
Quick Scan: Choosing Your No-Code Stripe Tool
Stripe Checkout
Best for: Websites needing a hosted checkout page.
Ease of use: Very high. Embeds easily.
Flexibility: Good for product catalogs.
Payment Links
Best for: Quick sales, donations, services, no website needed.
Ease of use: Extremely high. Fastest setup.
Flexibility: Simple, direct transactions.
Platform Integrations
Best for: E-commerce stores, CMS sites (WordPress, Wix).
Ease of use: High, once platform is set up.
Flexibility: Integrates deeply into existing workflows.
Setting Up Stripe No-Code Integration
The actual setup process will vary slightly depending on the tool you choose. But the general steps are similar. They all involve connecting your Stripe account to the no-code solution.
First, you need a Stripe account. If you don’t have one, sign up on the Stripe website. It’s free to create an account.
You’ll need to provide some business details. This includes your business name, address, and bank account information. Stripe needs this to know where to send your money.
Second, decide which no-code method you want to use. Are you selling single items and need a quick link? Payment Links are probably best.
Are you building a small online shop? A platform integration like WooCommerce might be ideal. Do you have a website and want a branded but hosted checkout?
Stripe Checkout is a strong contender.
Third, follow the instructions for your chosen method. For Payment Links: Log into your Stripe dashboard. Navigate to “Payment Links.” Click “Create payment link.” Fill in the details for your product.
Save it. Copy the link. For Stripe Checkout: You’ll typically get a snippet of code to add to your website’s button.
Or, your platform might have a direct integration for it. If adding to a website manually, you’ll embed a JavaScript snippet. This tells your button to trigger Stripe Checkout.
For Platform Integrations: Go to your platform’s payment settings. Select Stripe. Enter your Stripe API keys.
These keys are found in your Stripe dashboard under “Developers” > “API keys.” There are usually “Publishable key” and “Secret key.” Copy and paste them into the correct fields in your platform’s settings.
Fourth, test your setup. This is super important. Before you launch it to customers, make sure it works.
Most Stripe integrations allow for test mode. In test mode, you can make fake purchases. Use test card numbers provided by Stripe.
This way, you can go through the entire customer journey. See if the payment goes through. Check if you receive confirmation emails.
Ensure your Stripe dashboard shows the test transaction. This step prevents real customer issues down the line. Once you’re confident, switch from test mode to live mode in your Stripe settings.
It sounds like a lot, but each step is usually guided. Stripe’s documentation is excellent. Most platforms also have guides for integrating Stripe.
You’re not alone in this process. Taking it one step at a time makes it manageable.
Split Insight: Getting Your Stripe API Keys
Label: Where to find your Stripe API Keys
Note: Your API keys are crucial for connecting your website or platform to your Stripe account. You can find them by logging into your Stripe Dashboard. Navigate to the “Developers” section in the left-hand menu.
Then, click on “API keys.” You’ll see your “Publishable key” (starts with pk_test_ or pk_live_) and your “Secret key” (starts with sk_test_ or sk_live_). For live transactions, make sure you are using the “live” keys, not the “test” keys. Always keep your secret key private; never share it publicly.
Using Payment Links: A Step-by-Step Guide
Let’s walk through using Payment Links. This is often the absolute quickest way to start earning. It requires minimal technical knowledge.
Step 1: Log in to your Stripe Dashboard. If you don’t have an account, create one first.
Step 2: Find “Payment Links”. On the left-hand menu, look for “Payment Links” under the “Billing” or “Payments” section. Click on it.
Step 3: Click “Create payment link”. You’ll see a button to start creating your link.
Step 4: Add Item Details.
Item name: Enter what you are selling (e.g., “Consultation Session”, “Digital Ebook”, “Handmade Candle”). Price: Enter the amount customers will pay. Select the currency (e.g., USD, EUR).
Add Image (Optional): Upload a photo of your product or a relevant graphic. This makes the link look more professional. Quantity: Decide if customers can buy more than one.
For services, you might set this to 1. For products, you might allow them to select a quantity. Add Tax (Optional): If you need to collect sales tax, you can configure this here.
Add Shipping (Optional): If you are selling physical goods, you can set up shipping options.
Step 5: Customize Checkout Experience (Optional).
Collect customer details: You can choose to collect their email, name, address, etc. This is useful for follow-up or shipping. Add custom fields: For specific needs, like asking for a customer’s project brief.
Step 6: Create the Link. Click the “Create” button. Stripe will generate a unique URL for your payment link.
Step 7: Share Your Link. Copy the generated URL. Paste it wherever you want to share it. This could be:
In an email to a client.
In a social media post or bio. On your website as a clickable link. In a text message.
Step 8: Test It! Before sharing widely, click your own link. Go through the payment process yourself using test card numbers. Make sure everything looks and works as expected.
Then, switch your Stripe account to live mode to start accepting real payments.
This process typically takes less than five minutes from start to finish. It’s a game-changer for quick sales.
Using Stripe Checkout with No-Code Tools
Stripe Checkout is a bit more involved than Payment Links but offers a more integrated website experience. For a pure no-code approach, you often rely on platforms that embed Stripe Checkout for you. However, if you’re comfortable with a small amount of HTML, it’s very accessible.
The core idea is that you add a button to your webpage. When a customer clicks this button, it triggers Stripe Checkout. You don’t build the checkout form yourself.
Stripe handles that. You just need to tell your button which product or service to link to.
Here’s a simplified view of how it works without deep coding:
Scenario 1: Using a Platform with Stripe Checkout Integration
Many website builders and e-commerce platforms (like Wix, Squarespace, or even some WordPress themes) will have a setting to “Enable Stripe Checkout.” You follow their built-in instructions. You connect your Stripe account. When you add a product or service, you select Stripe Checkout as the payment method.
The platform handles generating the correct code to trigger Checkout when a customer clicks “Buy.” You don’t see or touch the code yourself.
Scenario 2: Using Stripe’s “Checkout” Button Generator (Slightly more technical, but still no deep coding)
Stripe used to have a more direct button generator. While less common now for pure no-code, the concept remains. You’d configure your product details in the Stripe dashboard.
Stripe would then give you a piece of JavaScript code. You copy this code and paste it into the HTML of your website, usually near the button you want to use. When the button is clicked, the code sends the product information to Stripe, which then opens the Checkout page.
You’re essentially copying and pasting pre-written code.
Scenario 3: Using a “No-Code” Tool that Connects to Stripe
There are many tools designed to build websites or landing pages without code. Tools like Carrd, Webflow (with integrations), or Unbounce often have direct integrations with Stripe Checkout. You design your page visually.
Then, you add a button. You configure that button to connect to Stripe Checkout. The tool handles the technical connection.
You simply select “Stripe Checkout” in the button’s action settings and enter your Stripe API keys.
Regardless of the exact method, the principle is the same. You configure the product and payment details. Stripe provides a secure, hosted checkout experience.
Your website simply points customers to it. This is a major win for security and user experience.
Platform-Specific Integrations: Deep Dives
When you use a common platform for your website or online store, Stripe integration is often straightforward. These platforms want to make it easy for you to get paid. Here’s a look at how it typically works on some popular ones:
Contrast Matrix: Common Platforms & Stripe
| Platform | Stripe Integration Method | Setup Difficulty | Customer Experience |
|---|---|---|---|
| Shopify | Built-in payment gateway. Select Stripe in settings. | Very Easy | Seamless, branded checkout. |
| WooCommerce (WordPress) | Official Stripe plugin. Install and configure in settings. | Easy | Integrated into WooCommerce checkout. |
| Wix | Select Stripe in payment settings. Connect your account. | Very Easy | Smooth, often branded by Wix. |
| Squarespace | Built-in Stripe integration. Enable in Commerce settings. | Very Easy | Integrated into Squarespace checkout. |
| Square Online | Can use Stripe for payments if needed, though Square has its own system. Often requires using Stripe Checkout. | Medium | Stripe Checkout page appears. |
| BigCommerce | Select Stripe as a payment option in settings. | Easy | Integrated into BigCommerce checkout. |
WooCommerce (WordPress)
If you use WordPress, WooCommerce is a very popular e-commerce plugin. Integrating Stripe is common. You’ll install the official Stripe for WooCommerce plugin.
Once installed, you go to WooCommerce > Settings > Payments. You’ll see Stripe listed. Click to enable it.
You then enter your Stripe API keys (Publishable and Secret keys). You can choose to use Stripe Checkout or Stripe’s direct card input on your site. Test mode is available.
Once live, customers can pay directly on your WooCommerce checkout page using their cards, Apple Pay, or Google Pay, all powered by Stripe.
Shopify
Shopify is a powerful e-commerce platform. Stripe is often a default or easily selectable payment provider. When setting up your Shopify store, you go to Settings > Payments.
You choose Stripe as your provider. You’ll either connect an existing Stripe account or set one up through Shopify. Shopify handles the technical connection.
This provides a very smooth checkout experience for your customers. They see your store’s branding throughout the payment process.
Wix and Squarespace
For website builders like Wix and Squarespace, adding Stripe is usually found in their “Commerce” or “Payment” settings. You’ll find Stripe in a list of available payment gateways. You click to connect your Stripe account.
Like Shopify, these platforms manage the integration for you. They ensure that when a customer checks out on your Wix or Squarespace site, Stripe securely processes the payment in the background.
These platform integrations are excellent because they handle many complexities. They manage things like recurring billing if you offer subscriptions. They can also handle SCA (Strong Customer Authentication) requirements automatically.
You get the benefits of Stripe’s robust payment processing without the deep technical work.
What This Means for Your Business
Understanding these no-code options opens up a lot of possibilities. It means you’re not limited by your technical skills. You can launch your online sales channel much faster.
This is especially true for small businesses, startups, and creators. You can accept payments securely. This builds customer confidence.
When it’s normal to use these tools: If you sell products online, offer services, need to collect donations, or want to monetize content. If you’re a freelancer, an artist, a blogger, or run a small shop. If you want to expand your reach beyond local customers.
When to potentially seek more advanced options: If you have very complex payment needs, like custom invoicing workflows that aren’t covered by standard tools, or if you’re building a large marketplace with many vendors. However, even many complex scenarios can be addressed with Stripe’s more advanced no-code or low-code tools.
Simple checks you can do:
Visit your Stripe dashboard. See if transactions are appearing (in test mode or live mode). Ask a friend to try making a purchase.
Get their feedback on the process. Check your email for Stripe confirmation messages. Verify that the money is eventually appearing in your bank account after the payout period.
The biggest takeaway is that accepting online payments is more accessible than ever. You don’t need to be a coder to use Stripe effectively. The tools are there to help you succeed.
Quick Fixes & Tips for No-Code Stripe Users
Here are some practical tips to make your no-code Stripe experience smoother.
- Always test in Test Mode first. This is crucial. Use Stripe’s test card numbers to simulate transactions. Check that everything works as expected before going live.
- Use clear product descriptions. On your Payment Link or Checkout page, be very clear about what the customer is buying. Avoid confusion.
- Keep your Stripe account updated. Ensure your business information and bank details are current. This prevents payout delays.
- Understand payout schedules. Stripe doesn’t send money instantly. Learn about their payout schedule for your region. This helps with cash flow planning.
- Monitor your dashboard. Regularly check your Stripe dashboard for any notifications or issues.
- Leverage Stripe’s support. If you get stuck, Stripe has excellent documentation and customer support.
- Consider subscriptions if applicable. If you offer services or content on a recurring basis, explore Stripe’s subscription tools. Many no-code platforms integrate with these too.
- Security is key. Never share your secret API key. Use strong passwords for your Stripe account.
Frequently Asked Questions About No-Code Stripe Integration
What is the easiest way to integrate Stripe without coding?
The easiest way is usually by using Stripe Payment Links. You create a link directly in your Stripe dashboard for a product or service. You then share this link anywhere.
No website or coding knowledge is needed.
Can I accept credit card payments without a website using Stripe?
Yes, you can! Stripe Payment Links allow you to accept payments via credit card and other methods without needing a website. You can share the payment link through email, social media, or messaging apps.
How long does it take to set up a no-code Stripe integration?
For Stripe Payment Links, setup can take as little as 2-5 minutes. For platform integrations (like on Shopify or WooCommerce), it depends on your familiarity with the platform but can range from 15 minutes to a few hours.
Do I need to pay extra to use Stripe’s no-code tools?
Stripe’s core services have transaction fees. There are usually no additional fees for using Stripe Checkout or Payment Links themselves. However, the platform you use to embed these tools might have its own subscription costs.
Is Stripe safe for online payments if I’m not a developer?
Yes, Stripe is very safe. When you use their official no-code tools like Checkout or Payment Links, Stripe handles all the sensitive payment data securely. You don’t have to worry about compliance or data breaches yourself.
Can I customize the look of the Stripe no-code checkout page?
With Stripe Payment Links, customization is limited to adding a logo and basic product details. Stripe Checkout offers more branding options, like adding your logo and choosing accent colors. If you use a platform integration (like WooCommerce), the checkout look is often controlled by your website’s theme.
What happens if a customer makes a mistake on a no-code payment?
Customers can usually cancel or correct simple mistakes during the checkout process. For issues after payment (like wanting a refund), they would contact you directly. You would then use your Stripe dashboard to issue refunds or manage disputes.
Conclusion: Payments Made Simple
Getting paid online shouldn’t be a barrier to starting or growing your business. Stripe’s no-code integrations, from simple Payment Links to robust platform connectors, make this a reality. You can now accept payments quickly, securely, and affordably.
Focus on what you do best. Let Stripe handle the payment processing. Your business can thrive.